Braided 9 Patch Design Process Tutorial

In this post, I'm going to show you step by step how I start with the Quilt Block Sketchbook to color in some simple squares and turn those squares into a complete quilt top design.

Step 1

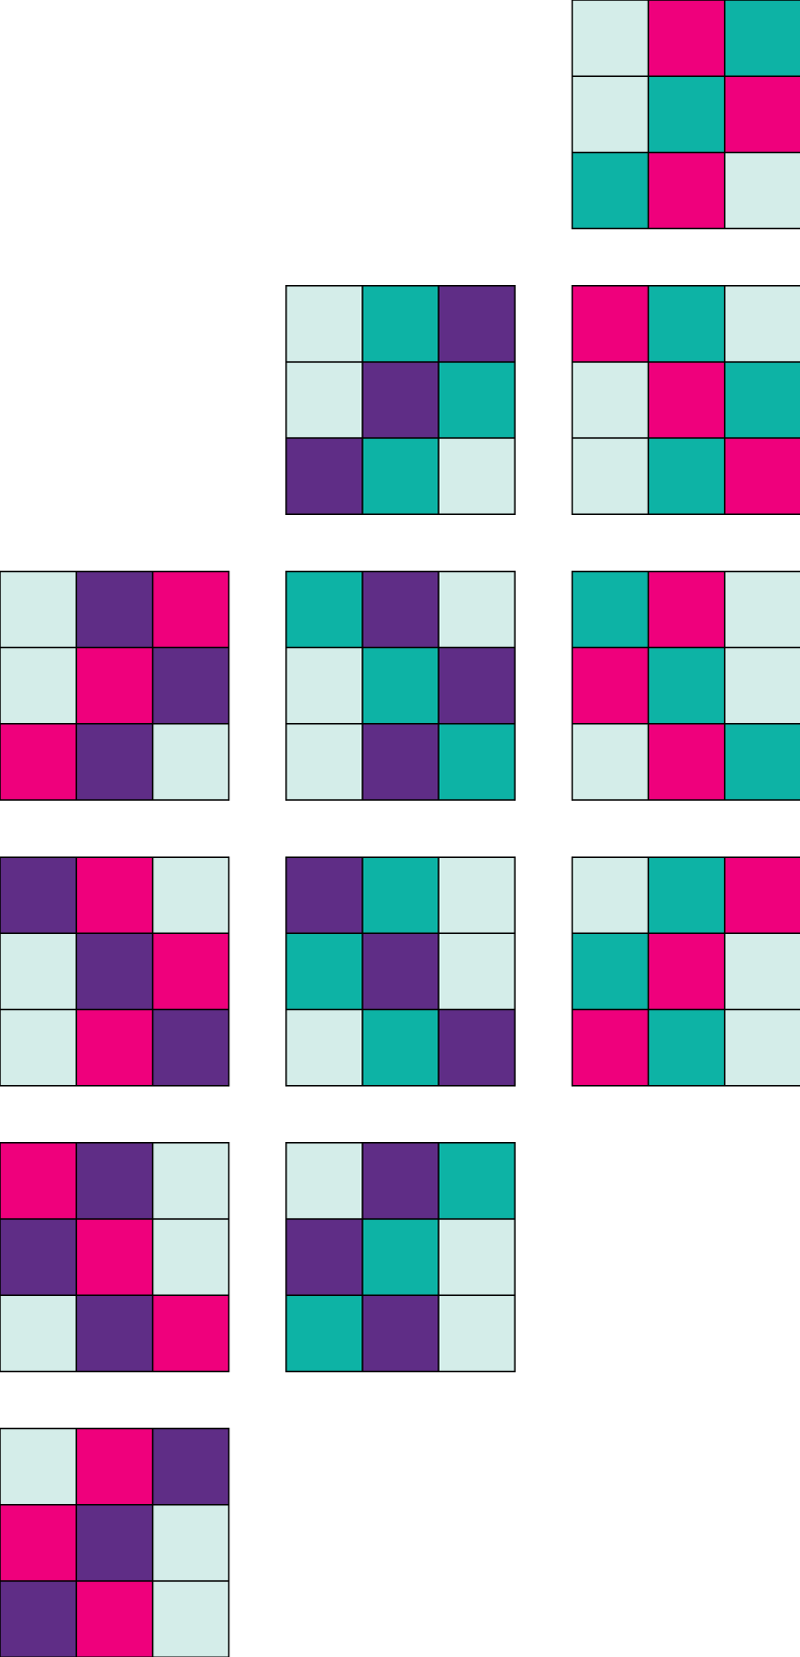
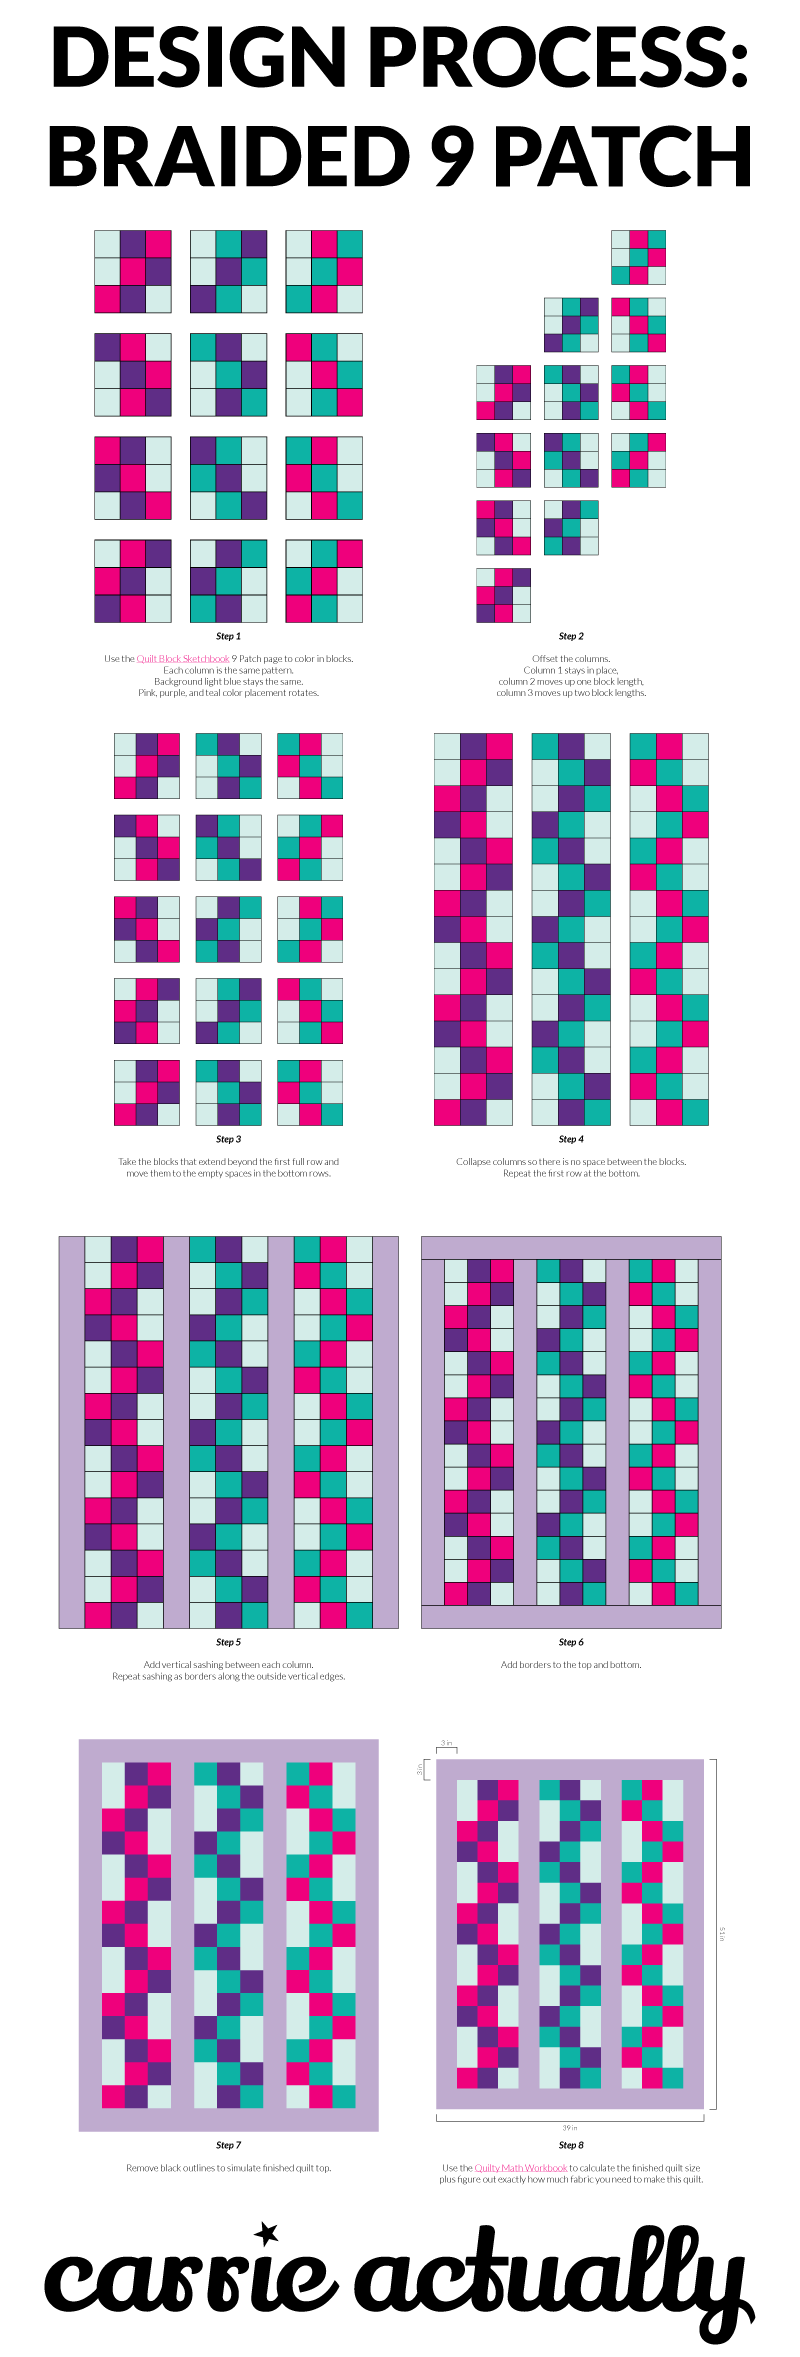
Use the Quilt Block Sketchbook 9 Patch page to color in blocks. Each column is the same pattern. Background light blue stays the same. Pink, purple, and teal color placement rotates.

Step by step quilt top design process - Braided 9 Patch - Use the Quilt Block Sketchbook 9 Patch page to color in blocks. Each column is the same pattern. Background light blue stays the same. Pink, purple, and teal color pl…

Step 2

Offset the columns. Column 1 stays in place, column 2 moves up one block length, column 3 moves up two block lengths.

Step by step quilt top design process - Braided 9 Patch - Offset the columns. Column 1 stays in place, column 2 moves up one block length, column 3 moves up two block lengths.

Step 3

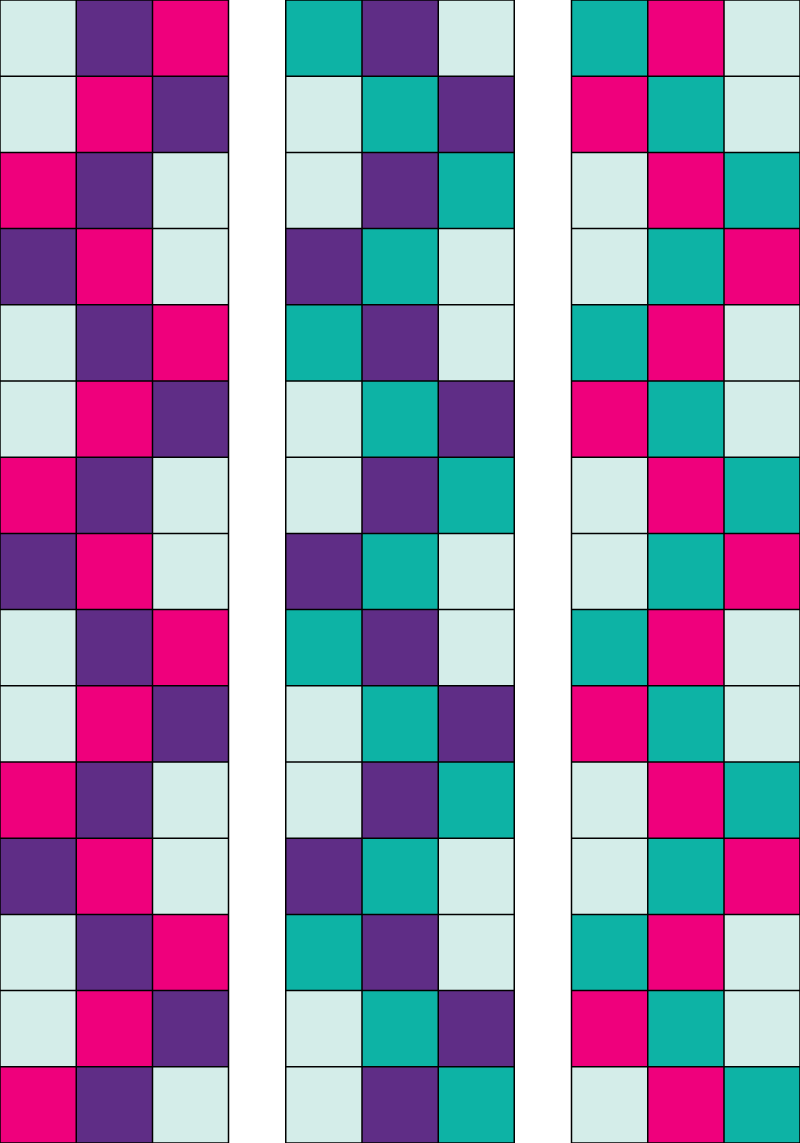
Take the blocks that extend beyond the first full row and move them to the empty spaces in the bottom rows.

Step by step quilt top design process - Braided 9 Patch - Take the blocks that extend beyond the first full row and move them to the empty spaces in the bottom rows.

Step 4

Collapse columns so there is no space between the blocks. Repeat the first row at the bottom.

Step by step quilt top design process - Braided 9 Patch - Collapse columns so there is no space between the blocks. Repeat the first row at the bottom.

Step 5

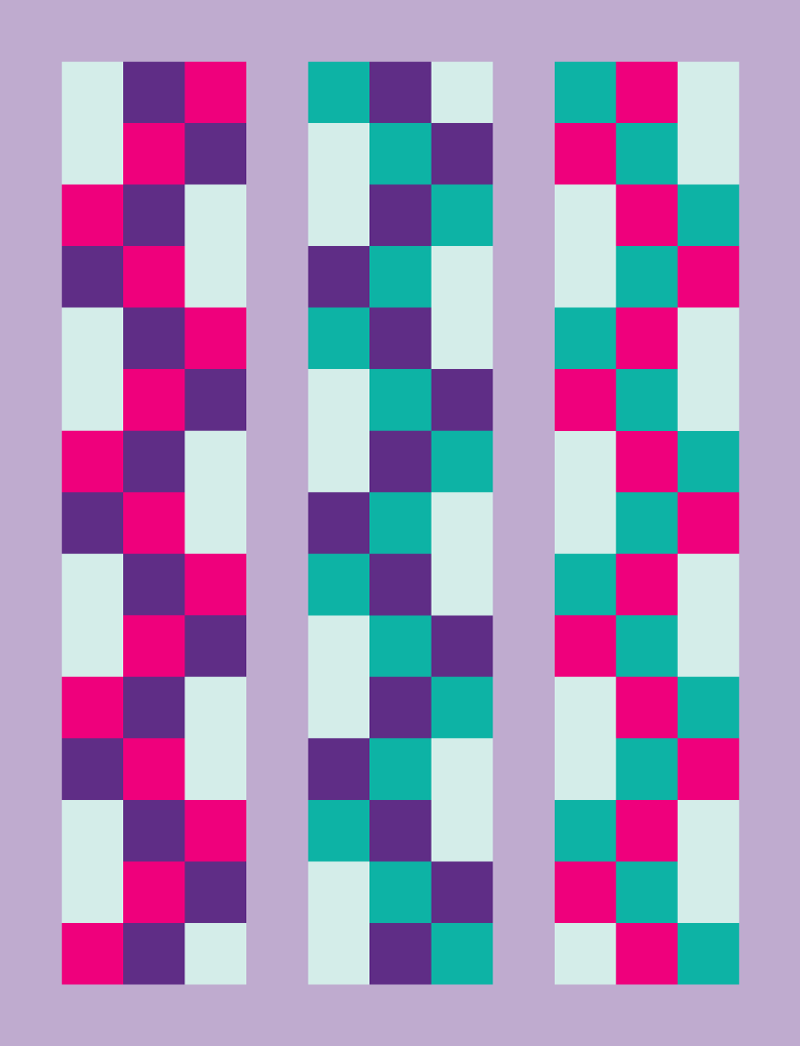
Add vertical sashing between each column. Repeat sashing as borders along the outside vertical edges.

Step by step quilt top design process - Braided 9 Patch - Add vertical sashing between each column. Repeat sashing as borders along the outside vertical edges

Step 6

Add borders to the top and bottom.

Step by step quilt top design process - Braided 9 Patch - Add borders to the top and bottom.

Step 7

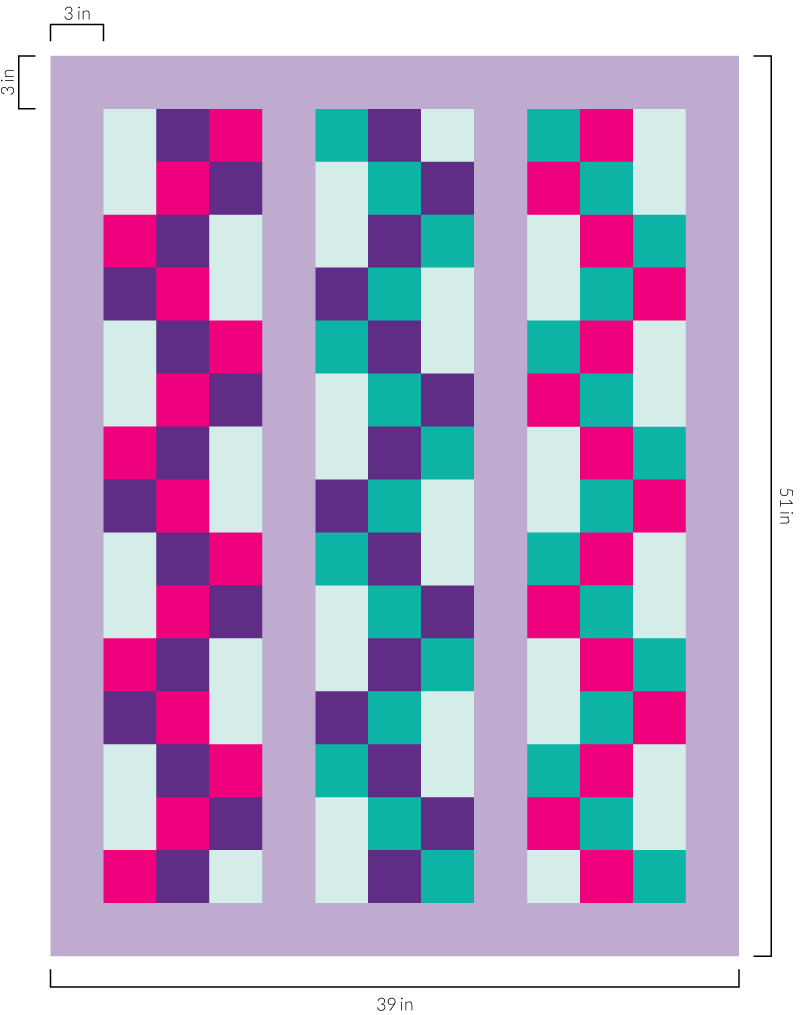
Remove black outlines to simulate finished quilt top.

Step by step quilt top design process - Braided 9 Patch - Remove black outlines to simulate finished quilt top.

Step 8

Use the Quilty Math Workbook to calculate the finished quilt size plus figure out exactly how much fabric you need to make this quilt.

Step by step quilt top design process - Braided 9 Patch - Use the Quilty Math Workbook to calculate the finished quilt size plus figure out exactly how much fabric you need to make this quilt.

Pin this tutorial!

Step by step quilt top design process - Braided 9 Patch