How to press seams open without using an iron

My son, Luke, is currently 18 months old. He's running around and grabbing everything. One of the things that has been holding me back from quilting the most since he's been born is the fear that he's going to grab the hot iron.

This simple how to is for you if you want to be able to press open a small seam without getting up from your sewing area and without heat.

Sew your two patches together with a 1/4 inch seam allowance.

No backstitching.

Open your unit and lay it right sides down on a firm surface.

I use my computer desk which has a glass top.

Get YOURSELF A FINGER PRESSER. Run it over the open seam on a firm surface and it presses really crisply.

[affiliate link]

Press your seam open back and forth and get all the way to each end. This will get it really crisp.

Turn it over and admire your work from the right side.

I know a lot of people talk about pressing the seam closed with the heat to set the stitches before pressing the seam open and that's great, I love that idea, but if I'm not going to be able to press at all because I'm worried about having the iron out, I'd rather use this no heat technique.

I also don't think you'll get as crisp of a press if you press to the side instead of open but I prefer pressing open anyway.

ps. If you've got a small child and you're looking to press larger areas and really do need that hot iron, I recommend putting up a baby gate and ironing on the other side.

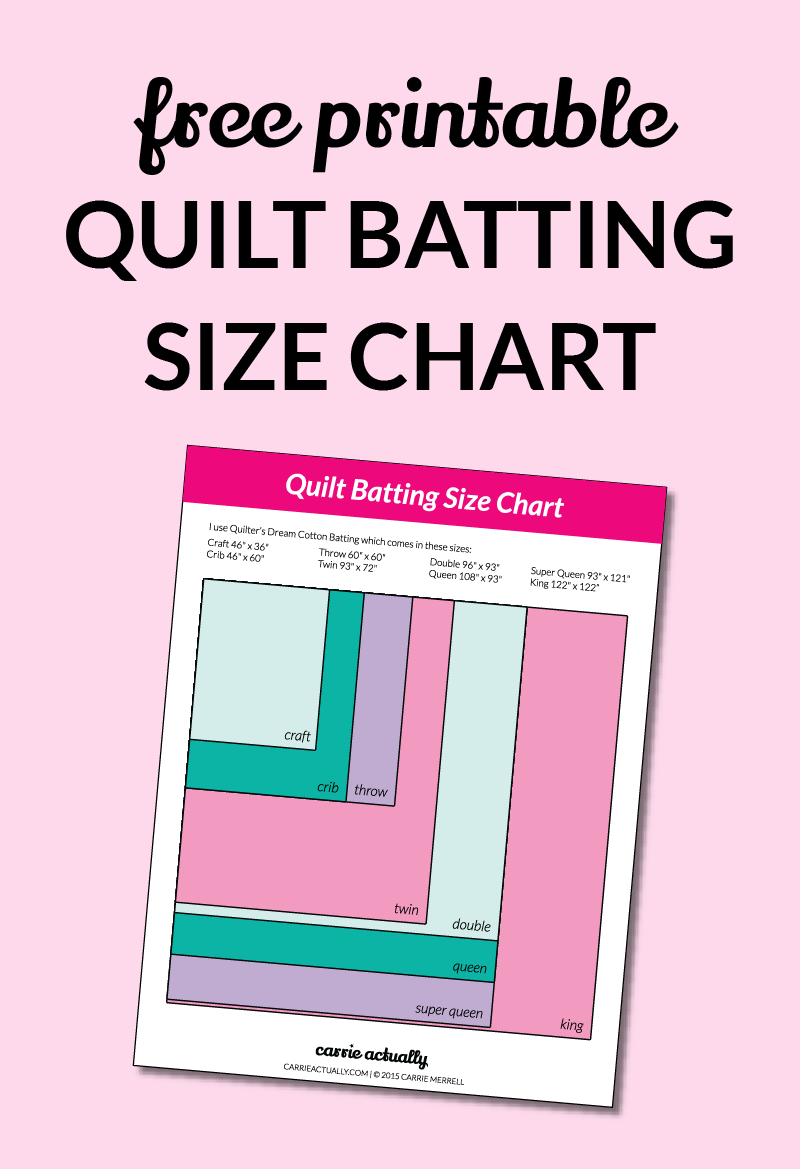
Quilt Batting Size Chart

This is one of those things I have to keep looking up over and over again for myself. I made my own little chart and diagram based on Quilter's Dream batting sizes since that's what my local quilting shop sells. Other brands might be slightly different sizes but this should get you in the ballpark.

You will want your quilt top to be a little bit smaller than your batting. You’d rather cut off extra batting around the edge than cut off extra quilt top around the edge.

Free Printable Quilt Batting Size Chart | I find myself looking this up over and over again, how do different quilt sizes compare to each other? Click through to get access to your free printable.

Patchwork piecing with a quarter inch seam allowance

When I made my first quilt, I didn't know that patchwork quilt patterns were designed to be sewn with a 1/4 inch seam allowance. I used what had, up to that point, been my sewing standard of a 3/8 inch seam allowance which meant that my quilt came out smaller than I anticipated.

An accurate and consistent seam allowance may seem tedious at first, but as you get further along with your quilt top and start connecting those rows to each other into blocks, it'll mean that it's easier to line up your points (those spots where multiple patches come together at the corners).

There are a couple options for keeping your seam allowance consistent:

  • Marking a 1/4 inch seam allowance on your machine

  • Using a 1/4 patchwork foot

Marking a 1/4 seam allowance on your machine

IMG_6084

Right this very moment, you can grab a ruler and some masking tape (I keep a roll of washi tape in with my sewing supplies) and mark a 1/4 inch seam allowance on your machine.

IMG_6085

A quarter inch on my machine lands on the feed dogs (those little metal teeth that help pull your fabric through)  so putting that masking tape on where it won't get in the way of sewing is tricky. My tape isn't quite straight but it's better than nothing.

Using a 1/4 inch patchwork foot

IMG_6086

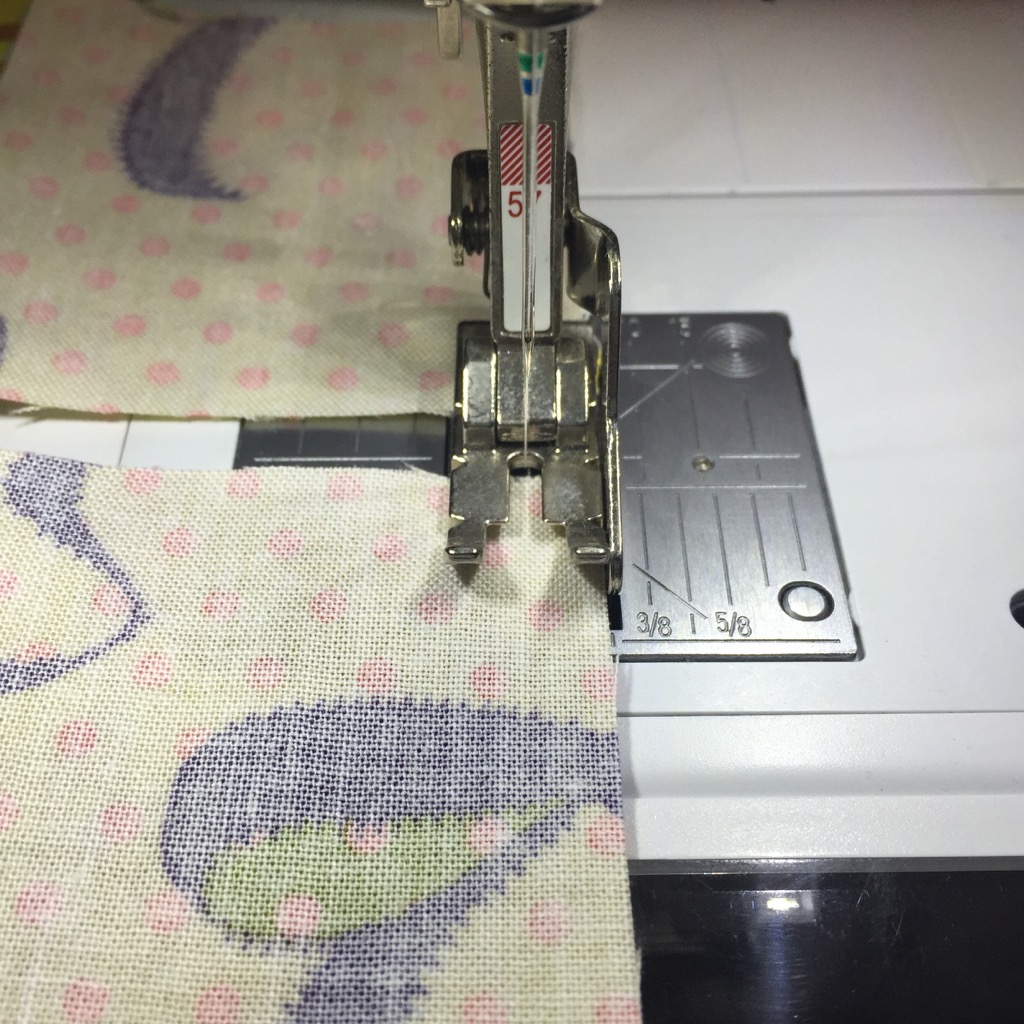
My preference is to use a special foot on my machine. I'm currently using a Bernina machine with a #57 foot which is described as a "patchwork foot with guide". For my old Singer, I had a generic patchwork foot with the guide that I found by asking about it at my local fabric store.

IMG_6090

With the patchwork foot with guide, you just pop your fabric in so that the right side of the fabric touches the left side of the guide and you sew.

IMG_6091

No backstitching needed when you're sewing all those patches together. I didn't know that when I made my first quilt and backstitching had been another one of those things I was so into the habit of doing by default.

IMG_6093

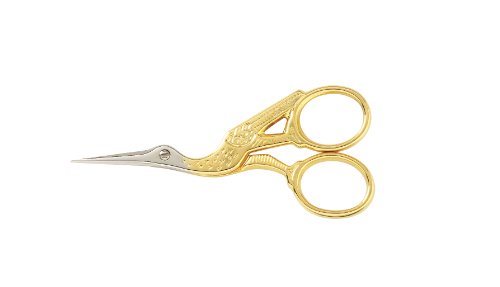
Since you're not backstitching, you can chain piece. As you finish sewing one pair of patches together, just pop in your next pair and keep going. When you've got a bunch done, go back and cut the thread between each pair. I find a small pair of embroidery scissors is easier to use here than a big pair of fabric sheers.

$13.44
GINGHER
Buy on Amazon
IMG_6092